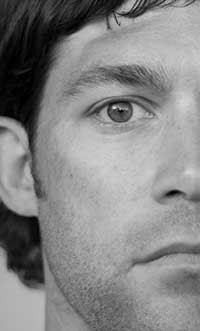
Hi there today and yesterday i was working on the avatar effect and i put a lot of effort on it it's an effect that transform any normal face into an avatar character like this :


P.S: In this tutorials you can follow just the pictures if you have a good skills in photoshop
1- If you have a colored photo go to Image>Adjustments>Black & White... then click OK to make it black and white.
2- Add a new layer by Layer>new>Layer than fill the layer with #349fc9 than follow the pic :

3- Click on Ctrl+Shift+Alt+E in the same time this will merge all layer in new one then follow the pic:

4- Go to image>adjustments>Exposure then :

5-Dupliacte the layer:

then Go to:

then:

6- Change and the opacity of the previous layer to:

7- Add a new layer :

8- Go to :

then:

9-change its blend mode to Soft Light and its opacity to 75 :

10- Duplicate the previous layer :

then change its blend mode to Normal and its opacity to 90
then add a layer mask to it :

11-Set the black as foreground color:

then select the brush tool (b) and set a big brush (click right on work area) with zero Hardness :

start painting in the face area and leave the left area dark :

In the next few steps we will add brightness effect.
12- Add new layer :

with the brush tool (B) set the white as foreground color :

and with medium radius and zero hardness:

paint in places that need brightness like this :

13- Go to :

then:

now change its blend mode to Soft Light :

14- Now with a small brush :

paint in places that should be shiny like this:

15- Go to :

then:

16- change the opacity of the previous layer to 55 :

17- Now go to:

then:

Now we will work on the eyes :
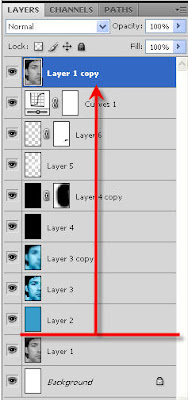
18- select the first layer (the original one) :

duplicate it (Ctrl+J) then drag it to the top like this:

go to :

19- select the brush tool and set the white as foreground color :

select a small brush with medium hardness :

20- now zoom in to the eye then star painting in the hole eye like this:
(paint in the yellow spot)

21-Duplicate the previous layer:

then go to:

then:

22- Now select the layer mask of the top layer:

with the previous brush with the black foreground color paint the white area of the eye :

now set the blend mode and the opacity of the top layer to "Color Dodge" and "85":

the next steps is how to add the light point and the text.
23- add a new layer Layer>New>Layer and with a very small brush :

add some points to the face :

24-Go to:

then:

25-now the text :
add text with the next font: Lithos pro and make big enough :

now go to:

then:

and this is the final result :

write a comment or retweet it to make me write more ....
and if there was any mistake please tell me .
SR:-ps99.


P.S: In this tutorials you can follow just the pictures if you have a good skills in photoshop
1- If you have a colored photo go to Image>Adjustments>Black & White... then click OK to make it black and white.
2- Add a new layer by Layer>new>Layer than fill the layer with #349fc9 than follow the pic :

3- Click on Ctrl+Shift+Alt+E in the same time this will merge all layer in new one then follow the pic:

4- Go to image>adjustments>Exposure then :

5-Dupliacte the layer:

then Go to:

then:

6- Change and the opacity of the previous layer to:

7- Add a new layer :

8- Go to :

then:

9-change its blend mode to Soft Light and its opacity to 75 :

10- Duplicate the previous layer :

then change its blend mode to Normal and its opacity to 90
then add a layer mask to it :

11-Set the black as foreground color:

then select the brush tool (b) and set a big brush (click right on work area) with zero Hardness :

start painting in the face area and leave the left area dark :

In the next few steps we will add brightness effect.
12- Add new layer :

with the brush tool (B) set the white as foreground color :

and with medium radius and zero hardness:

paint in places that need brightness like this :

13- Go to :

then:

now change its blend mode to Soft Light :

14- Now with a small brush :

paint in places that should be shiny like this:

15- Go to :

then:

16- change the opacity of the previous layer to 55 :

17- Now go to:

then:

Now we will work on the eyes :
18- select the first layer (the original one) :

duplicate it (Ctrl+J) then drag it to the top like this:

go to :

19- select the brush tool and set the white as foreground color :

select a small brush with medium hardness :

20- now zoom in to the eye then star painting in the hole eye like this:
(paint in the yellow spot)

21-Duplicate the previous layer:

then go to:

then:

22- Now select the layer mask of the top layer:

with the previous brush with the black foreground color paint the white area of the eye :

now set the blend mode and the opacity of the top layer to "Color Dodge" and "85":

the next steps is how to add the light point and the text.
23- add a new layer Layer>New>Layer and with a very small brush :

add some points to the face :

24-Go to:

then:

25-now the text :
add text with the next font: Lithos pro and make big enough :

now go to:

then:

and this is the final result :

write a comment or retweet it to make me write more ....
SR:-ps99.
No comments:
Post a Comment