
Intro:
For this tutorial we’ll be trying to replicate an awesome piece of photo manipulation suggested by one of our users. If you would like to see your suggestions made into a tutorial please drop me a comment here.I’ll be the first to admit that this kind of thing is far from my area of expertise, and consequently I had no idea how this tutorial would turn out. Photo manipulation is very tricky, but hopefully this tutorial will teach the average Photoshop user some cool techniques to try and achieve a similar effect.
Finally, it should be pointed out that this is the longest and most complex tutorial I’ve ever written. You may be staring at the slow page load in horror, but please bear with it, as hopefully the outcome is worth the wait!
Final Image
Here is the final image that we’ll be creating: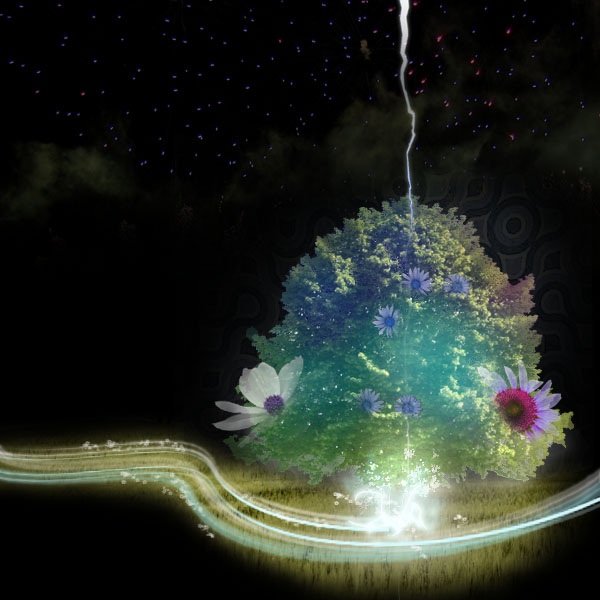
Step 1:
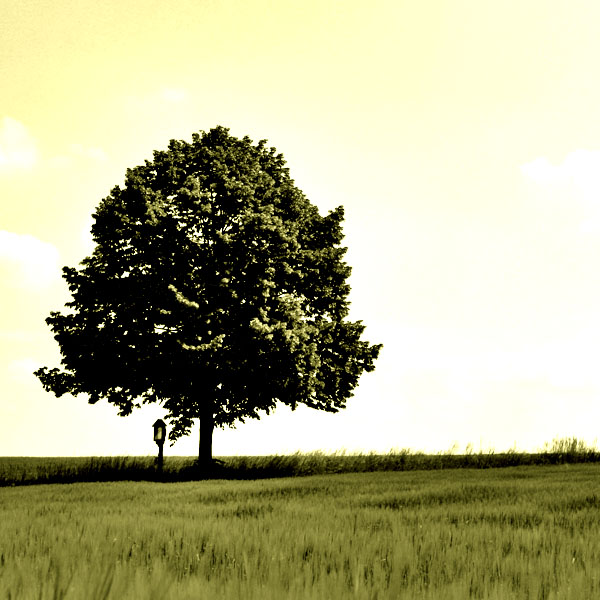
Open up your image of a tree, making sure to crop and resize the image to fit nicely within your document.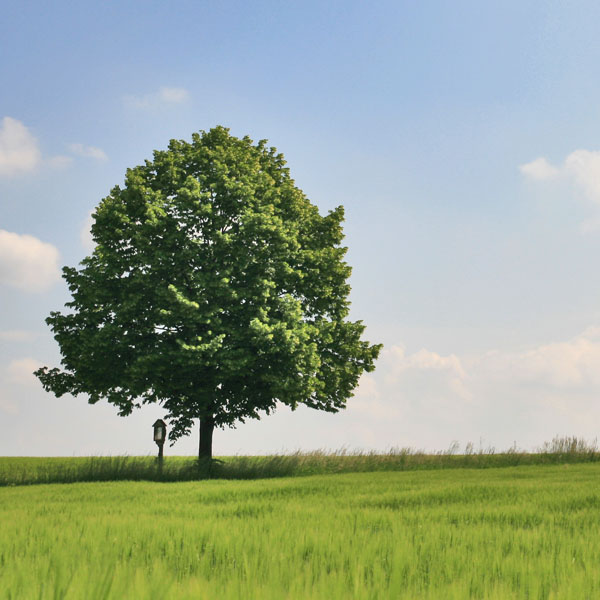
Step 2:
Now, duplicate this background image so that you can retain your original tree photo should you happen to mess up anything in the next stages. Be sure to hide the original background photo layer.THIS BIT IS IMPORTANT! – We are going to be using the extract tool, a very useful tool that may be new to many of you. Before you do anything else you have to watch this video in order to understand the next few stages of the tutorial. I could have posted a written version here, but the video is so clear and easy to understand I figured it would be more beneficial just to watch and duplicate it.
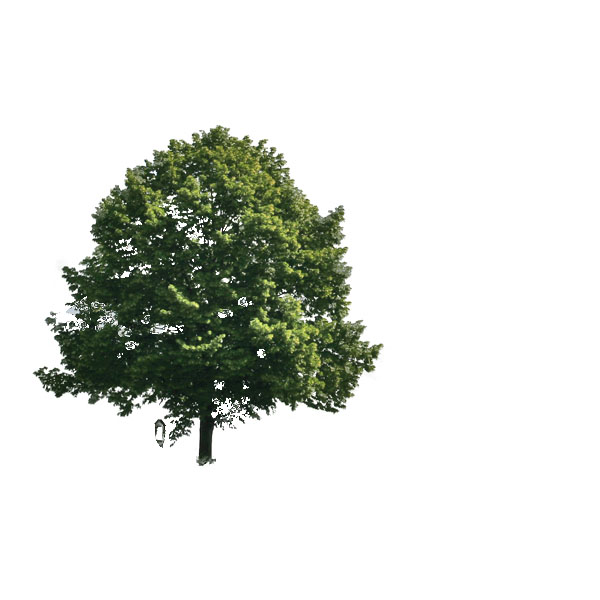
The 3 images below show the various stages of following the video link above.
Extracting edges. I’m using the highlighter tool within extract to select the edges of the part of my image that I want to extract. I’m also highlighting all of the tiny areas of the tree that are showing through parts of the sky, as I want my new background to show through these areas too.

I choose the ‘fill section’ tool within extract to retain the part of the image I want to keep:

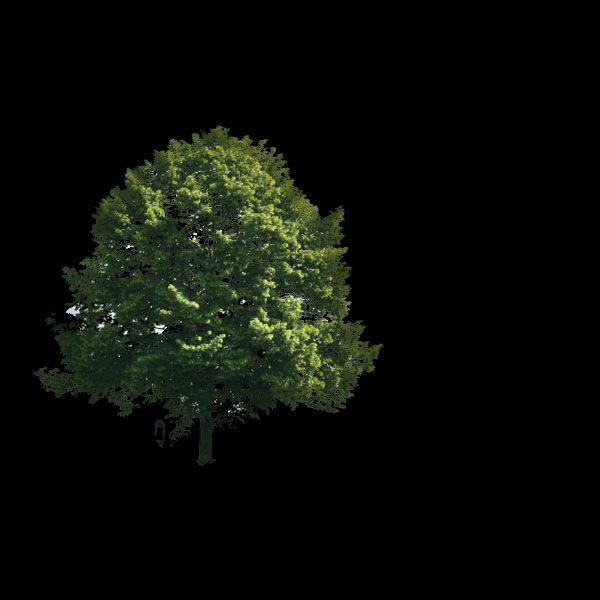
This is my extracted image, now on a transparent background.
Again, if these steps don’t make sense to you, but sure to watch the video link provided at the start of Step 2.
Step 3:
When I try using the history brush to repair parts of my extracted image, I get a Photoshop error message “Could not use the history brush because the current canvas size idoes not match that of history state.”. This is pretty annoying, and none of the solutions I found to fix this problem seem to work. However, you’ll always run into problems in design, and the trick is to find an alternate solution to work around them!To assess the damage that the extraction has caused I create a new layer below my extracted tree image layer and fill it with black. Surprisingly it doesn’t actually look too bad!
Step 4:
However, I want to tidy things up as much as possible. I start by selecting the eraser tool and getting rid of the object that looks like a lamp just to the left by my tree trunk. Then I use the clone stamp tool to duplicate solid areas of the tree and cover up most of the white patches left from the extraction. To use the clone stamp tool simply select it from the toolbar and hold ‘alt’ whilst clicking on a solid part of your tree, then click over a part that you want to repair. I also clone parts of the tree to cover up parts of the black background showing through, just because the edges here look a little jagged.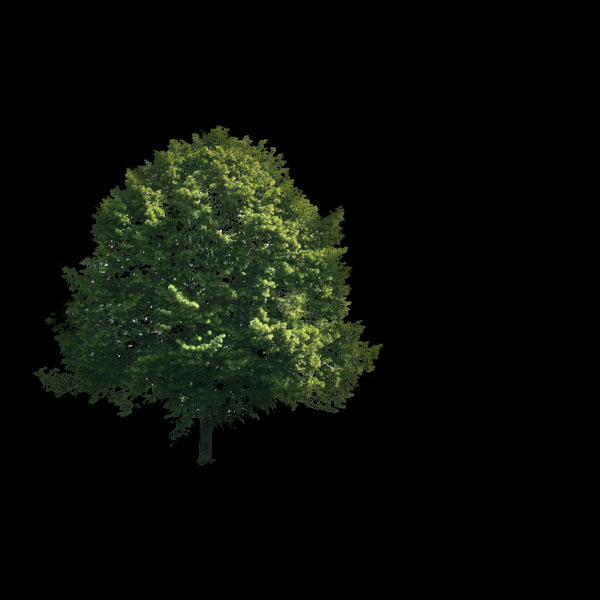
Step 5:
Now we want to liven up our tree image. Create a new layer above your tree layer called ‘tree colors’. Select a very large, soft brush, of color 81F8FF and apply it rough in the center of your tree image. Next apply a brush stroke 0697A0. Now apply two more brush strokes of color 062AA0 around the top left of your tree. Apply two brush strokes of color F2F460 to the bottom right of your tree. Two more brush strokes of color 925281 to the top right. Then finally 2 more to the left of your tree of color 6C9252. The outcome should look something like the image below:
Step 6:
Now reduce your brush strokes layer’s opacity to 70% and set the layer blending mode to ‘screen’.
Step 7:
Now go back to your tree image layer and select around your tree using the magic wand tool. Then go back to your brush strokes layer and delete this selection, leaving only brush strokes over your tree, not around it.
Step 8:
The brush strokes are a little intense so I reduce the layer’s opacity to 50%.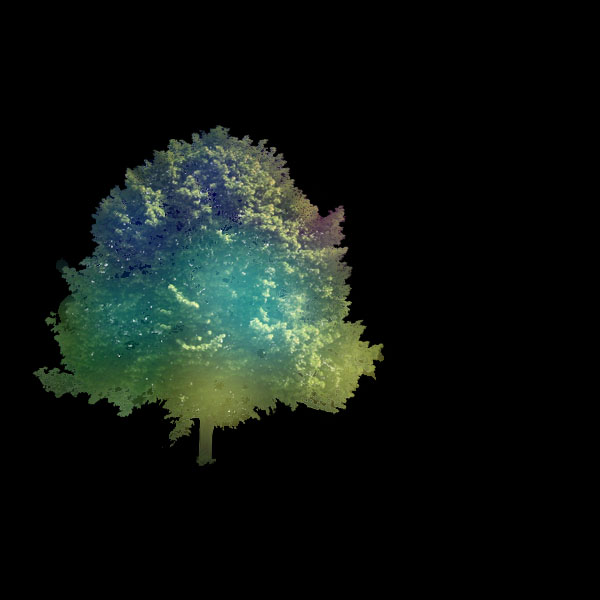
Step 9:
Now duplicate your ‘tree colors’ layer containing your brush strokes. Go to the layer blending options for the duplicate layer and set a color overlay to white.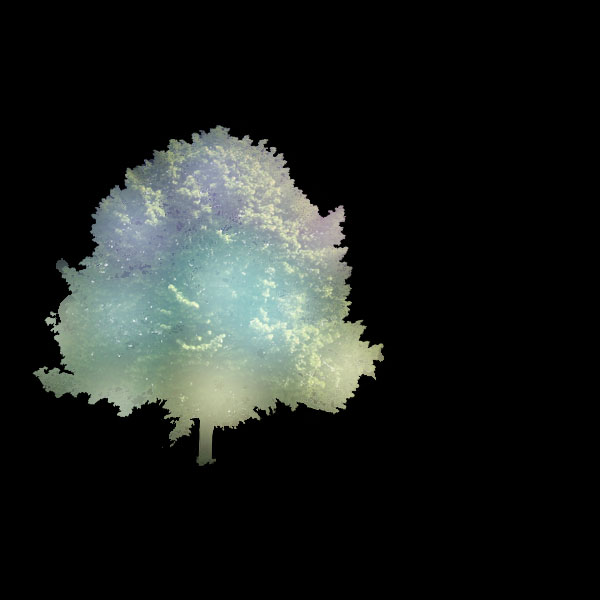
Step 10:
Select a large, soft, eraser brush and erase most of your duplicated tree layer except for right at the very bottom, leaving the trunk completely in tact. Then up your layer’s opacity from 50% to 100% to create a nice silhuotte effect at the base.
Step 11:
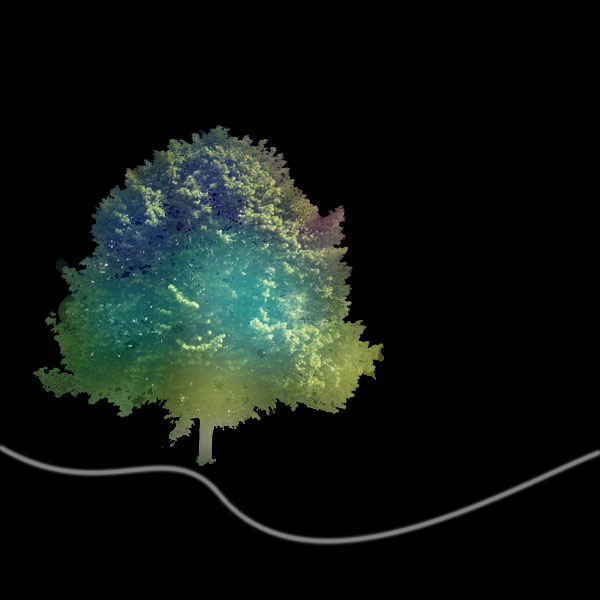
Next, use the pen tool to create a nice curved line going across your image. I won’t go into how to use the pen tool in this tutorial, but if you’re not familiar with it here are some good tutorials for you to look at:http://photoshopupdates.blogspot.com/2011/08/photo-manipulate-explosive-magical.html

Step 12:
Now with your path tool selected right click somewhere on your path and click ‘stroke path’. Make sure that your brush tool is selected and that ‘simulated pressure’ is unchecked. You will end up with a nice white line like the image below.
Step 13:
Now go to the layer blending options and apply an outer glow with the settings shown below. Then reduce your layer’s opacity to 50%.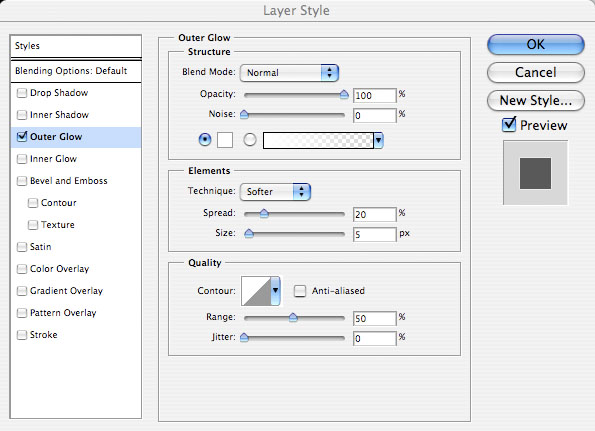
Step 14:
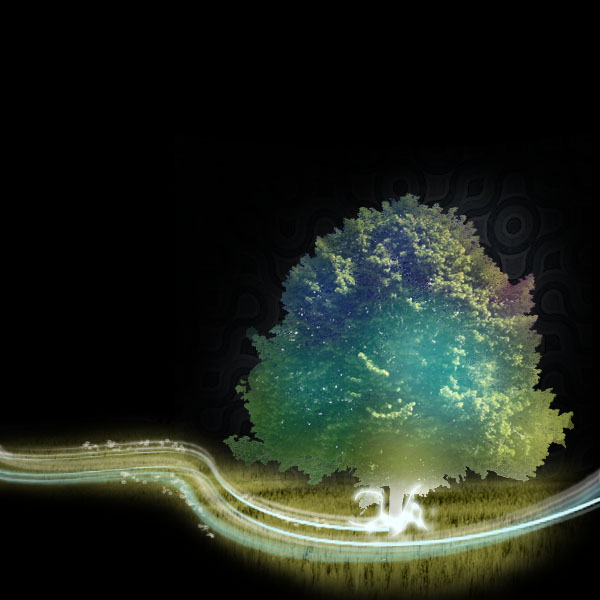
Now go to edit > transform>perspective and change the perspective so that the image appears close to you in the center, and then gets further away at the edges. Stretch your line wider if it moves away from the edges of your document.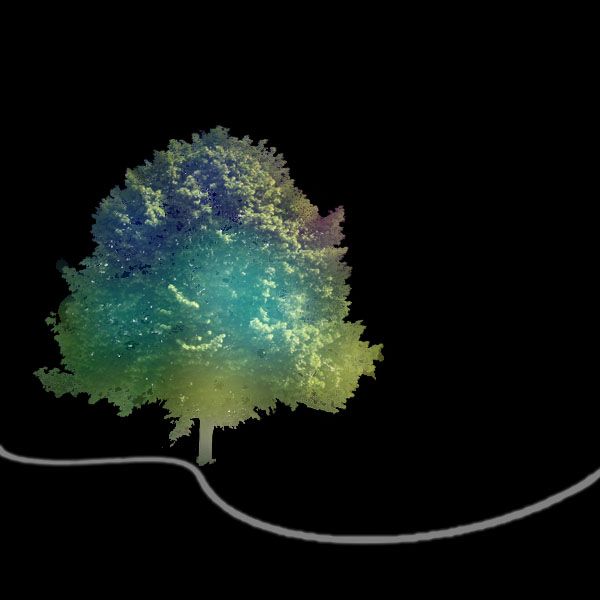
Step 15:
Now duplicate this layer to create more lines, and then move them around, play with sizes, rotations and outer glow sizes until you have a real mixture of lines overlapping. I moved some of the line layers behind my tree image so that they appeared to be behind it. Some of my line layers I upped the layer opacity to make them stand out more.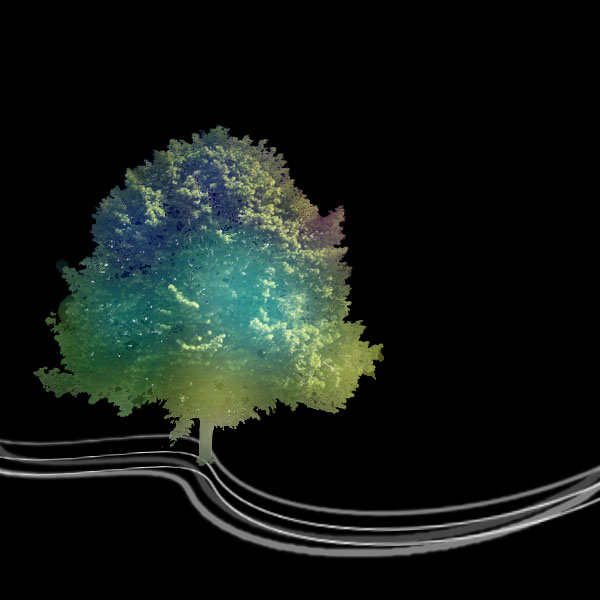
Step 16:
Now hide all of your layers except your original background layer (the layer containing the original tree photo and field, sky etc…). Go to image > adjustments > desaturate to grayscale the layer. Then adjust the brightness/contrast and increase the contrast by 40.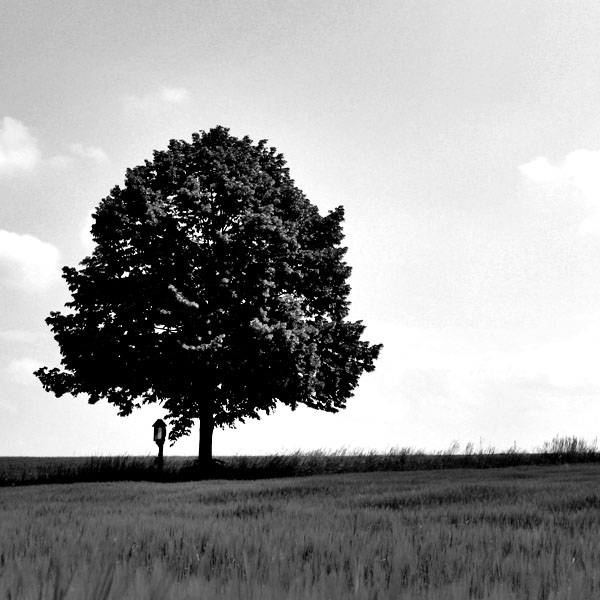
Step 17:
Now go to image > adjustments > color balance and apply the settings shown below. The outcome is also shown below:
Step 18:
Make all of your hidden layers visible again, and then selecting the ‘black background’ layer that covers your original photo, use a large soft eraser brush to erase the black image, following the path lines and revealing the background beneath.
Step 19:
The bottom of the tree is looking a little dull, so to brighten it up I select the layer with the white color overlay which we were working with earlier and duplicate it 4 times. This builds up layers of white, making it overall brighter. Then I merge down until I just have one layer.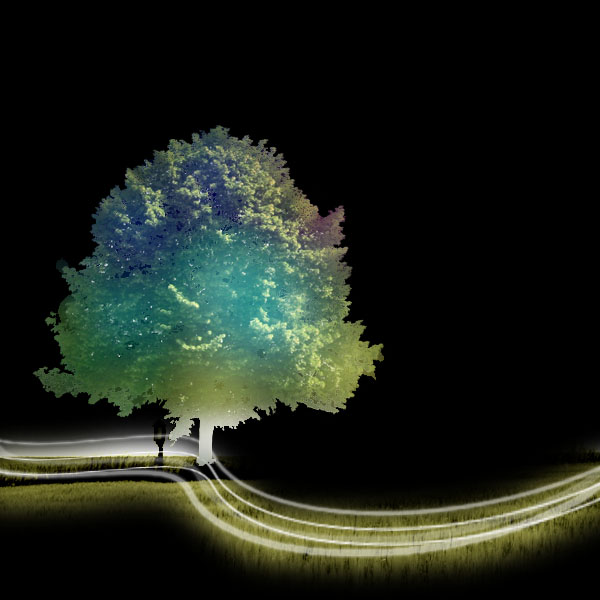
Step 20:
The image is looking ok so far, but I’m not happy with the background that was exposed by erasing the black layer. The horizon between field/sky in the background is distracting from my tree image and lines of light. I want to move my tree to the bottom right of my image, but remember that the final tree image consists of several layers. I want to retain each individual layer so can’t merge down, so I simply create a layer set containing all my different tree images and then select my entire set and move all images to where I want them.
Step 21:
I still don’t like the way that the sky is showing through in my background, so I select an area of my grass just before the horizon using the lasso tool and copy/paste it onto a new layer. I repeat this process until all parts of the sky/horizon are hidden, leaving just grass showing. These new images blend together pretty well, but to get rid of any subtle edges between them I merge them down into just one layer, and then select the smudge tool (10px brush, 25% opacity) to quickly smudge away any harsh edges.
Step 22:
Now I want to give the grass around my tree base some more light as this will be the lightest part of my end image. Simply go back to my ‘black background’ layer and use a soft eraser brush in a kind of oval shape around the base of my tree.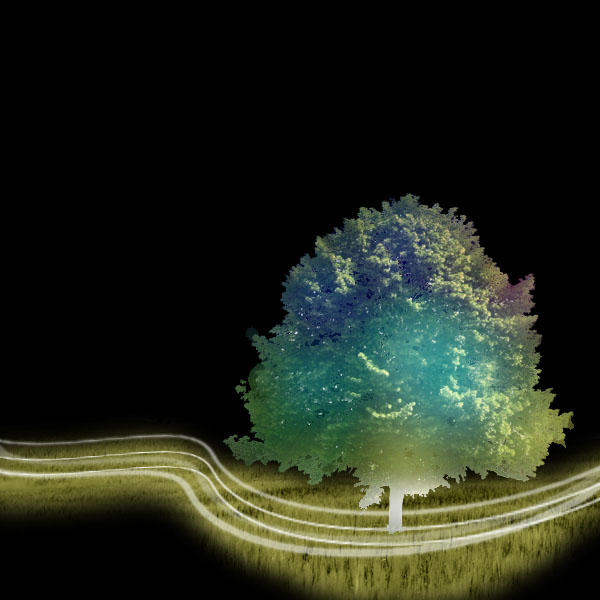
Step 23:
However, I don’t want the lines to continue right past the tree (well at least not all of them). I want some to stop at the base of the tree in a kind of light explosion, and a couple to continue past to the edge of the image. I select some of my pen line layers and just use the marquee selection tool to delete them from the point that they reach the tree.
Step 24:
Now I select a large, soft black brush and select my ‘black background’ layer. I paint over the right edge of my image, and reduce the amount of background showing through near the left edge of my ‘light lights’. The trick to achieving more realistic, subtle shadowing is to paint from the edge inwards, gradually reducing the opacity of your brush. So paint a brush stroke around the edge of your image at 100% opacity, then a step in reduced to 65% opacity, then again reduce to 30% opacity and so on. The end result is a far less harsh barrier between light/shadow. I’ve applied this effect to most of my image’s shadow, you can see the result below:
Step 25:
My light lines are looking a little flat and boring, so I change the outer glow on some of them to A2F3FD.
Step 26:
I really want my lines to look a lot busier, and less sparse than they currently are. Again, I don’t want to merge all my layers quite yet, so I group all of my light line layers in a layer set. Then I duplicate this entire layer set, and reduce the opacity of the bottom set to 25%, being sure to move it slightly upwards to fill some of the space.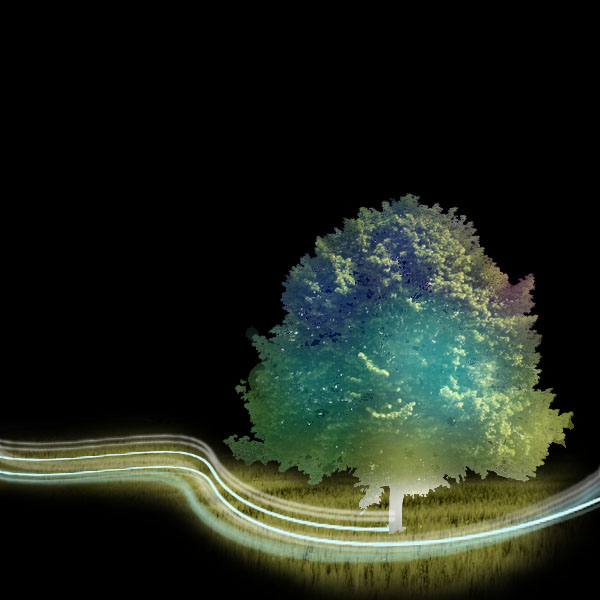
Step 27:
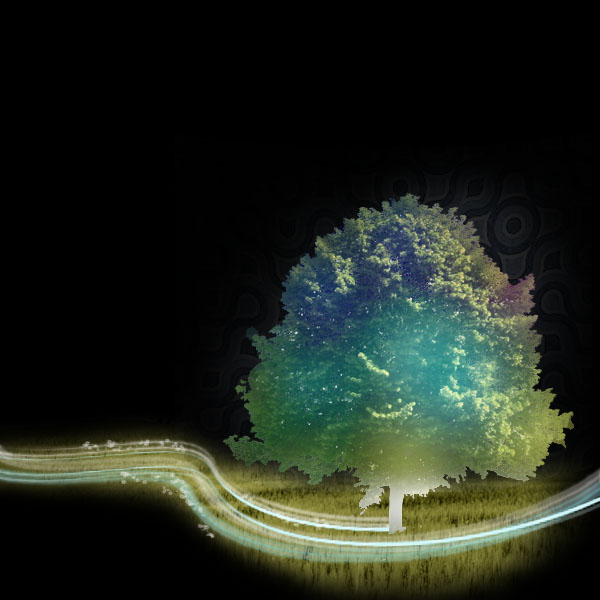
Select a soft eraser brush (opacity 10%) and eraser parts of each light line. Pay particular attention to the curves that get further away from you.
Step 28:
I did a quick search for ‘pattern’ and found quite a nice retro image. I paste the image onto a new layer behind my tree layers and above my ‘black background layer’. Then I desaturate my image and go to image > adjustments > color balance and apply a subtle blue tint.
Step 29:
Then a select about 1/3 of the pattern from the left side using the marquee selection tool and go to edit > transform > skew, and move the corners upwards to create a cool perspective. I repeat this technique with the right third of my pattern image. The result is a nice 3d effect to my pattern.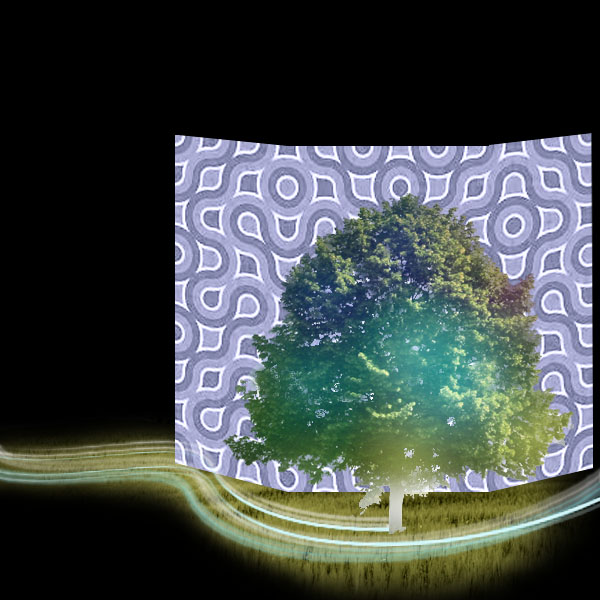
Step 30:
Then a up the contrast by +50, reduce the opacity of the layer to 14%, reduce the saturation by -50 and use a large, soft eraser brush to erased away the edges and carefully blend the bottom of the pattern image into my grass background.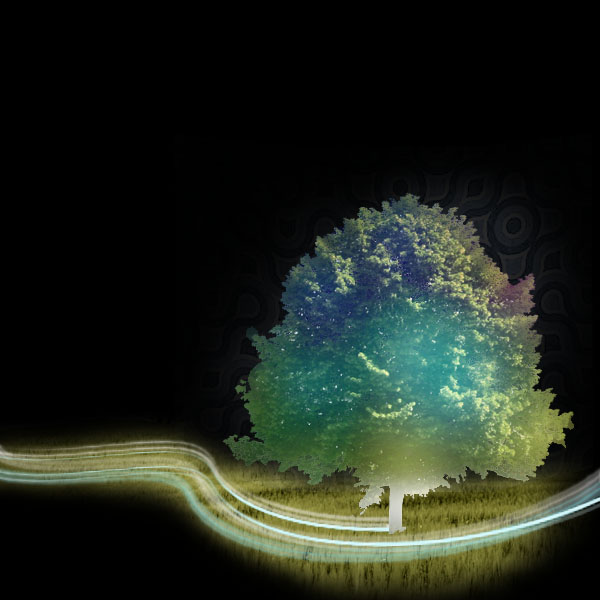
Step 31:
Now, you may have gotten the impression so far that I can’t stay put working on just one area of this image. You’d be right, I do like to dart around and work on one area a bit, then come back to it later. The important thing is that this just doesn’t matter too much with photo manipulation. Just work on an area until you get bored, and then feel free to come back to it later, just keep improving your image over time. So without further ado… I’m going to start making these ‘light lines’ look a little better!A go to my brushes and select the stars brush set, applying the setting shown below:
Step 32:
I paint in some stars along various parts of my lines, and then apply an outer glow to my stars layer with the settings shown below. Finally I reduce the layer opacity to 60% and use a small eraser brush to reduce the number of stars showing, to make them stand out better.
Step 33:
Now using the path techniques demonstrated earlier create some small random lines around the base of your tree. Apply the outer glow settings shown below: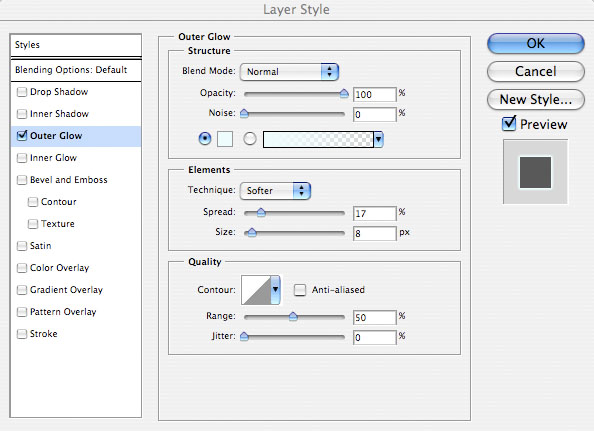
Step 34:
Now duplicate this new layer containing your small lines of light. Go to the original layer underneath your duplicate and reduce the layer opacity to around 25%. Then use the smudge brush (65% strength) to smudge the light lines upwards to the base of your tree. Change the outer glow color of your smudged layer to B4FDFD. Finally duplicate your layer containing the stars that you made earlier. Move this new layer above the layers containing your light lines at the base of your tree and up it’s opacity to 100%. Erase away any excess stars until you are satisfied with how things look.
Step 35:
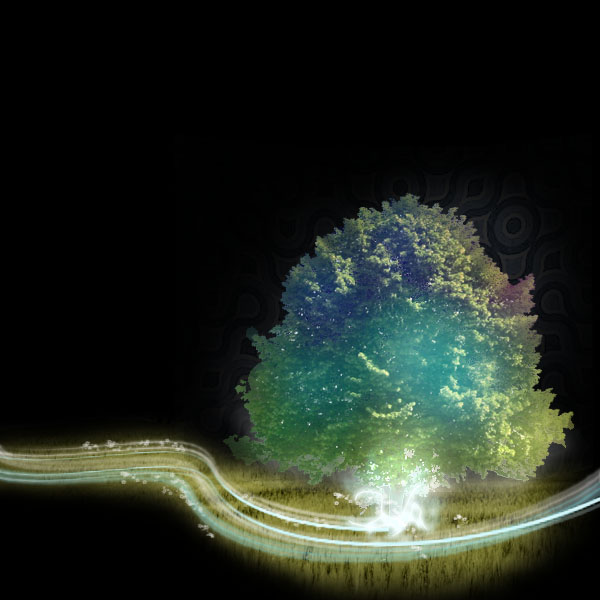
Next go back to your original ‘tree’ layer (the layer containing the actual photo of your tree, the one below your color overlay effects layer). Select a soft white brush with the settings shown below and brush around the bottom leafs of your tree, paying particular attention to the area around the light explosion we’ve created around the trunk.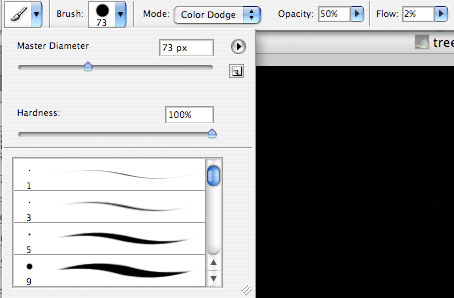
Step 36:
Now create a new layer called ‘light oval’. Create an oval shape using your circular selection tool and fill it with a radial gradient ranging from 100% white at the center to 0% green at the edges. I’ve positioned the result over the black background so that you can see it more easily.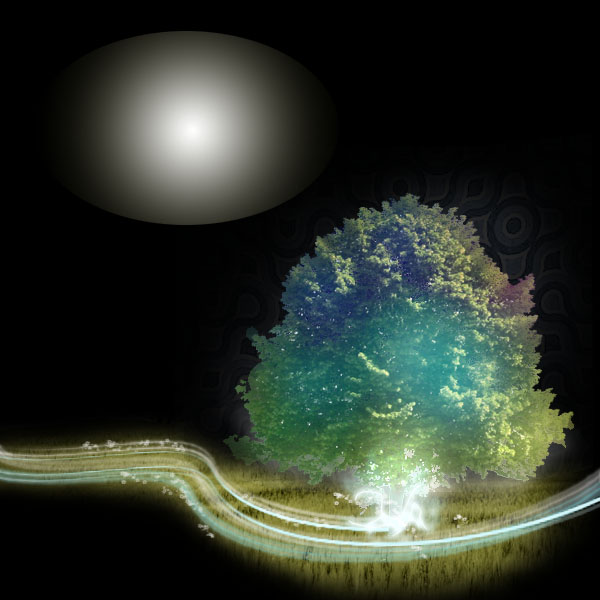
Step 37:
Now go to edit > transform>perspective and warp the image so that it has similar perspective to the grass in your main background. Then just transform the image by stretching/resizing it until you have something like the image below: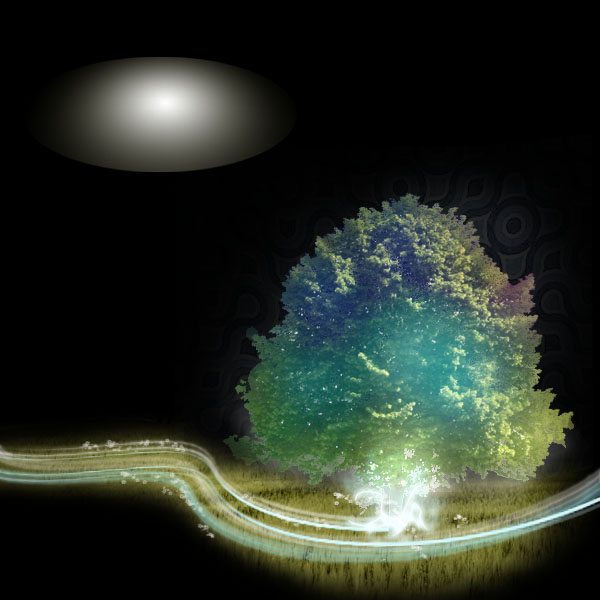
Step 38:
Now move this layer below your ‘tree’ layer and position it so that the brightness part of your light oval is directly behind your light explosion at the base of the tree. Then simply reduce the layer’s opacity to 70% and use a soft eraser brush to get rid of any harsh edges caused by the oval. The result is that the grass in your background image appears to be being lit up by the light of your ‘light lines’.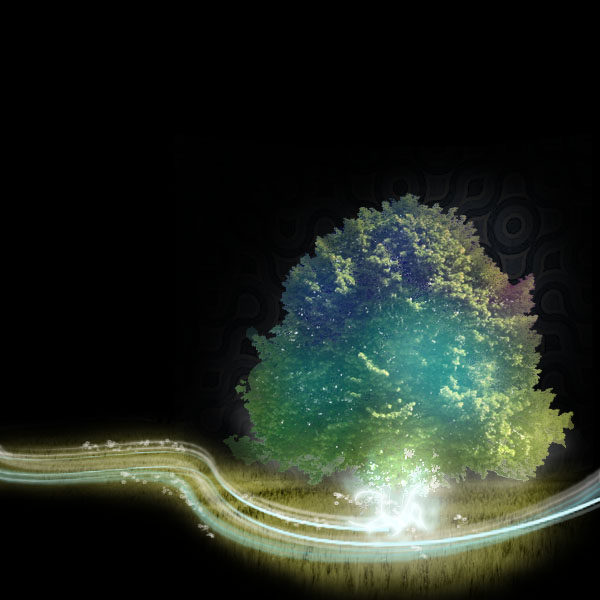
Step 39:
Now I want to add some cool flowers and objects into the branches of my tree image. I paste in a picture of some flowers that I like: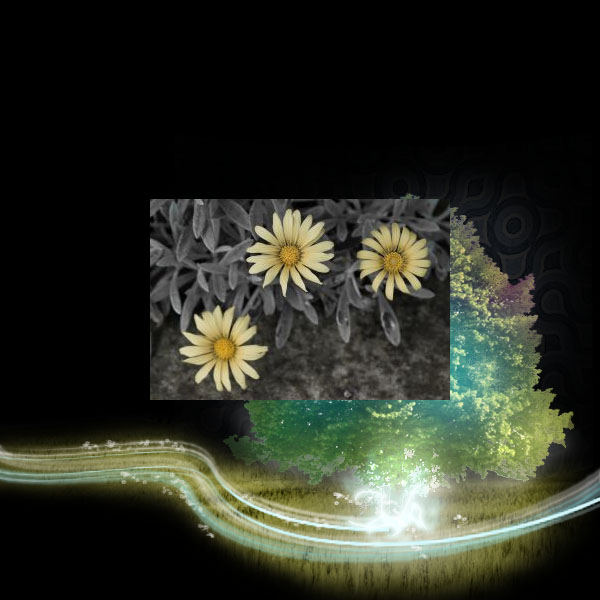
Step 40:
I use the lasso tool to cut out each flower, and then resize my flowers and fit them nicely over my tree image. Finally I go to image>adjustments>hue/saturation and then make the use -180 to give the flowers a nice purple tone.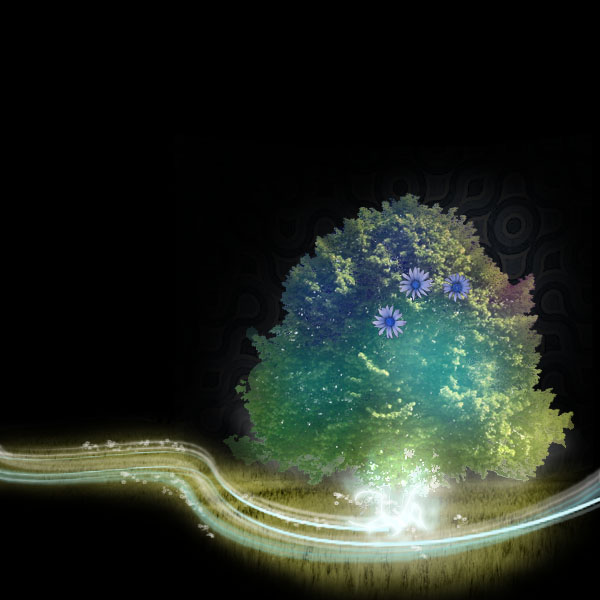
Step 41:
Then I select a soft eraser brush (15px in size, 50% opacity) and gently erase parts of my flowers so that they appear to be coming out of the tree. Then I reduce my layer opacity to 78% to blend them better.
Step 42:
Now repeat this exact technique with other flowers that you add to your tree, just playing around with opacities, erasing, and hue.
Step 43:
I want to create an awesome background, so I paste in this great photo of some fireworks.
Step 44:
Now, obviously we don’t want our background covering up our entire image, so I move the background image below our tree layers and retro pattern layer, but above my ‘black background’ layer. I then reduce the layer opacity to 40%. Don’t worry about the image still being too imposed on our image, that will be sorted out shortly.
Step 45:
I go to layer>add layer mask>reveal all and drag upwards along my image using a black to transparent gradient. This masks off the bottom of my fireworks image, leaving only the top of it remaining.
Step 46:
I don’t want to have just a boring linear fade on my background image, so grab a large, soft, eraser brush with a 10% opacity and begin erasing parts of the background around my tree, this creates a nice radial fade in my background, drawing more attention to my tree image.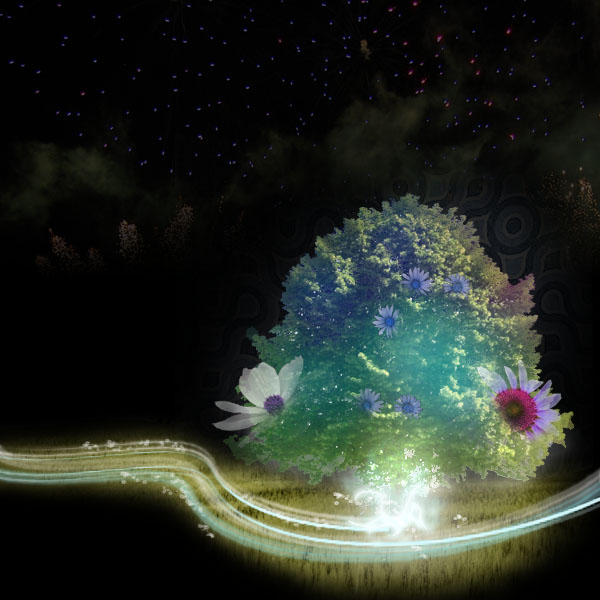
Step 47:
I want to add some lightning to my image, so select a nice photo and paste this onto a new layer set above all other layers.
Step 48:
I use the lasso tool to cut out the central bit of lightening, and then rotate it so that it is coming straight down into the center of my tree.
Step 49:
Then apply the outer glow settings shown below to achieve the outcome below:

Step 50:
Then to finish things off I reduce the width of my lightning to make it more realistic. I use a soft eraser brush to make it blend nicely into the top of my tree. Then I copy the bottom half of the lightning and position this down the middle of my tree. This way it looks as if one peice of lightning if going through my tree to create the huge light explosion at the base. I erase most of this second piece of lightning to make it look as if it is in the middle of the tree and not in front of it.
And we’re done!
To finish off the image I upped the contrast of my lightning background image by 10 and erased away most of the firework explosions as they were a bit distracted.
I really hope that you enjoyed this tutorial, and if you have any questions please let me know.
sr:psd.fanextra
No comments:
Post a Comment