In this tutorial, I’ll show you several techniques for enhancing a basic banner design for a product or service. These techniques can be employed to add a fresh splash to many of your designs!photoshop updates


Create a new layer, and grab the Reflected Gradient Tool. Set the blending mode to Difference and create an effect like the one shown below by creating multiple gradients on the same layer. (Use black and white as the foreground and background colors)


Once this is done, set the blending mode of the reflected gradient layer to Soft Light and lower the opacity till you get an effect that you like.photoshop updates

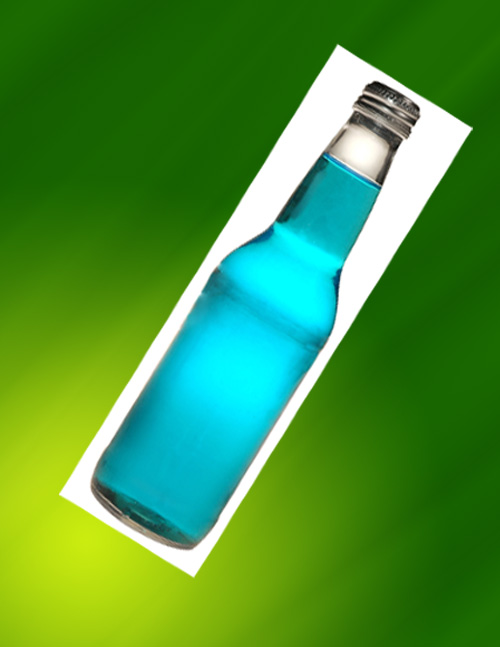
Use the Magic Wand Tool to select the white area and delete it. Then reposition it in the bottom left corner and rotate it so that the cap points to the upper right.
I want to change the color of the bottle to green so that it matches with the rest of the ad. To do this, create a new layer, then Ctrl+Click on the thumbnail of the layer containing your bottle. Select a nice green color, and fill the selection of the bottle on your new layer with it. Then change the blending mode of the layer to Hue.
With the bottle still selected, create another new layer, and use a soft black brush and run it along the sides of the bottle. Then set the blending mode of the layer to Soft Light.


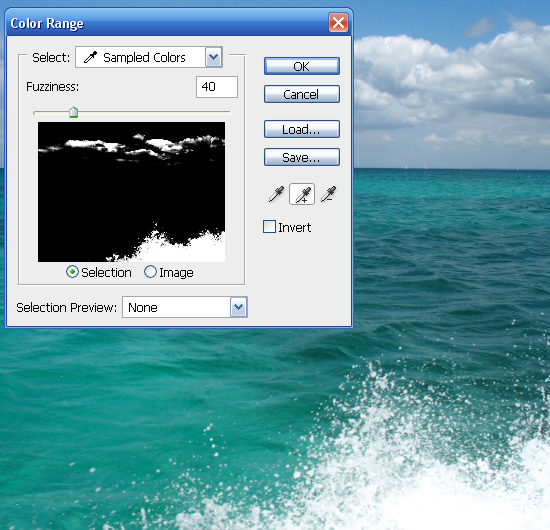
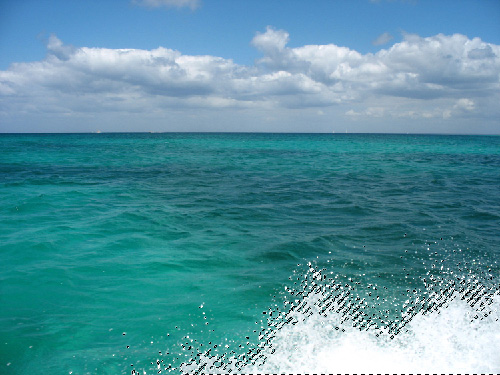
Open the splash image. The only part of this image we want is the splash that is in the bottom right corner. To select this, we are going to select Color Ranges. Go to Select > Color Range. Use the Add to Sample Eyedropper and select different areas of the splash.
Click OK to select the areas that are in white. Remove the clouds from the selection by using a selection tool and holding alt.
Copy the splash and paste it onto a new layer in your ad. Re-size it and place it in the lower left corner on top of the bottle and the leaves. Then go to Filter > Sharpen > Sharpen to sharpen the splash. You may want to sharpen it a few times, but don’t overdue it. I also decided to grab a large soft eraser and partially erase the outer edge of the splash to soften it some.

Right click, and choose Stroke Path. Then select the Brush from the drop down menu and make sure Stimulate Pressure IS checked. Press Esc to delete the path. Then apply the following Layer Styles (Right Click Layer > Blending Options):
All that’s left is to rotate the ring until its at a nice angle. To create more, simply duplicate the layer (Right Click > Duplicate Layer) and re-size them if needed.
To create the other strokes, use the Pen Tool, and apply the same layer styles shown above. Remember to place some layers behind the bottle and change opacity to create more effects.
To create the circles along the path, simply increase the spacing on your brush tool before you stroke the path.
Then start brushing onto your new layer. Try to keep bigger circles next to the bottle and smaller ones as they move further away. Set the blending mode of the layer to Overlay when you are finished.
Do the same thing on a new layer with a smaller brush and lower the opacity of the layer.
I’m also going to add another splash layer that will lie between the circle layers. After I have my splash in place, I’m going to Ctrl+Click on the large circle layer, and delete this selection from my new splash layer. This way, the splash won’t appear under the circles, since the circle layers are set to Overlay.
And of course, here’s a PSD you can grab for free with the tutorial contents!
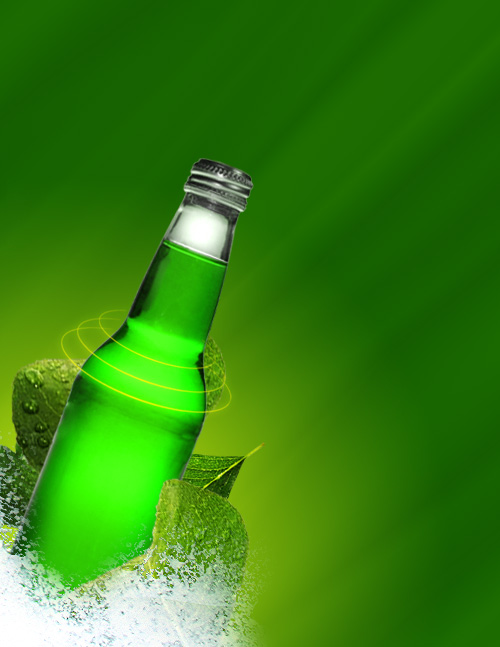
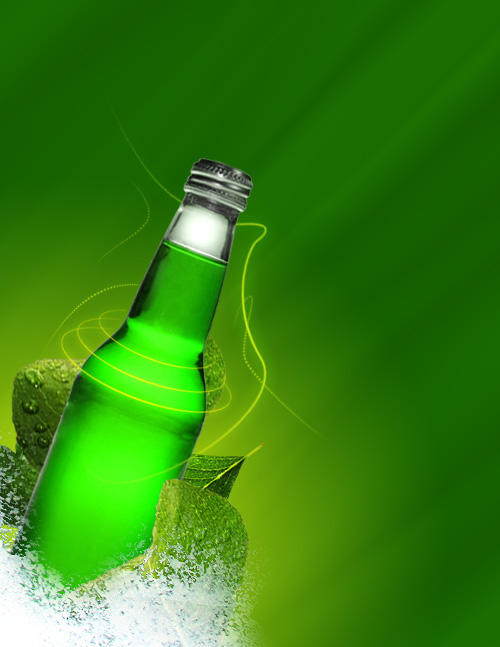
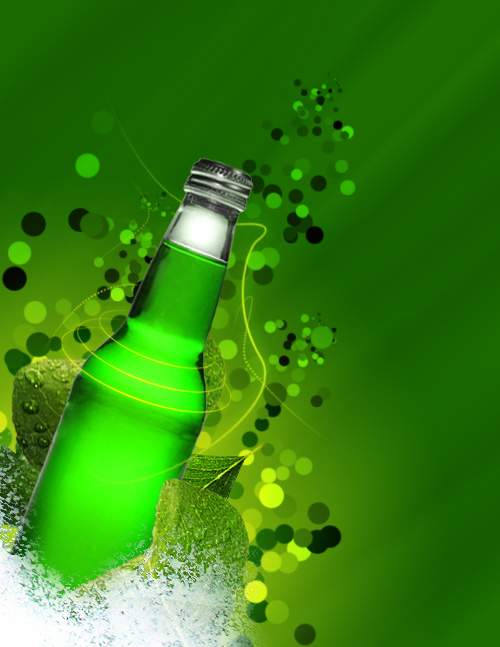
The Finished Ad
Before we begin, lets take a look at what the finished result looks like.Images We’re Using
Before we can create the ad, we need to have the images for it. I’ve decided to use the following:Step 1 – Creating the Background photoshop updates
Create a new document, mine is 500x647px. Grab your Gradient Tool and set it to Radial Gradient. I feel like making a green inspired ad, so I’m going to use #ceed12 as my foreground color and #186600 as my background color. Create a gradient near the lower left corner of the document.Create a new layer, and grab the Reflected Gradient Tool. Set the blending mode to Difference and create an effect like the one shown below by creating multiple gradients on the same layer. (Use black and white as the foreground and background colors)
Once this is done, set the blending mode of the reflected gradient layer to Soft Light and lower the opacity till you get an effect that you like.photoshop updates
Step 2 – Working on the Bottle
Now that the background is complete, lets bring the bottle into the ad and re-size it.Use the Magic Wand Tool to select the white area and delete it. Then reposition it in the bottom left corner and rotate it so that the cap points to the upper right.
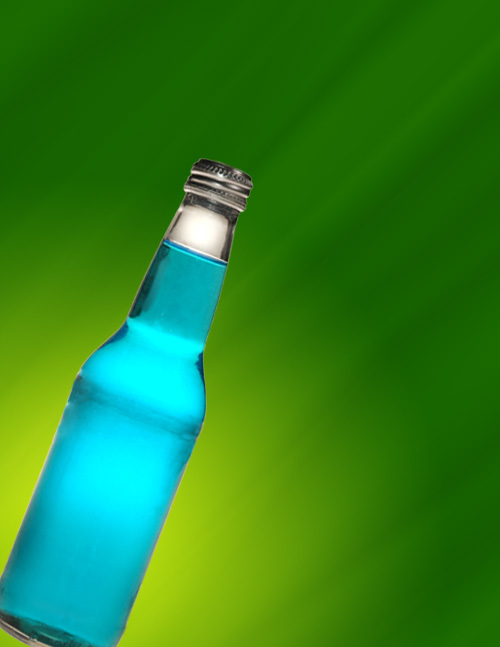
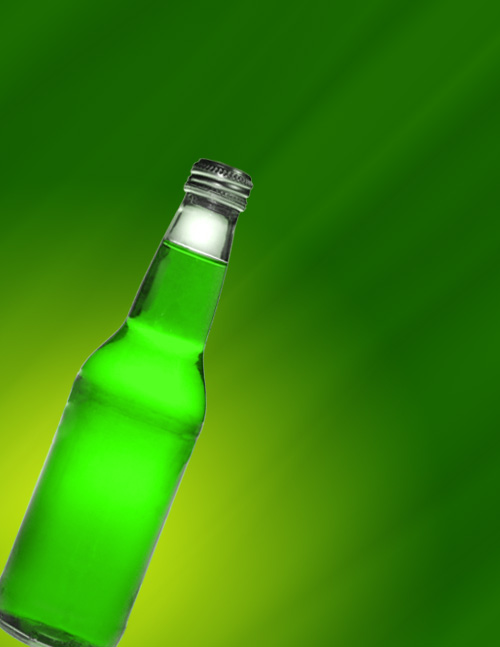
I want to change the color of the bottle to green so that it matches with the rest of the ad. To do this, create a new layer, then Ctrl+Click on the thumbnail of the layer containing your bottle. Select a nice green color, and fill the selection of the bottle on your new layer with it. Then change the blending mode of the layer to Hue.
With the bottle still selected, create another new layer, and use a soft black brush and run it along the sides of the bottle. Then set the blending mode of the layer to Soft Light.
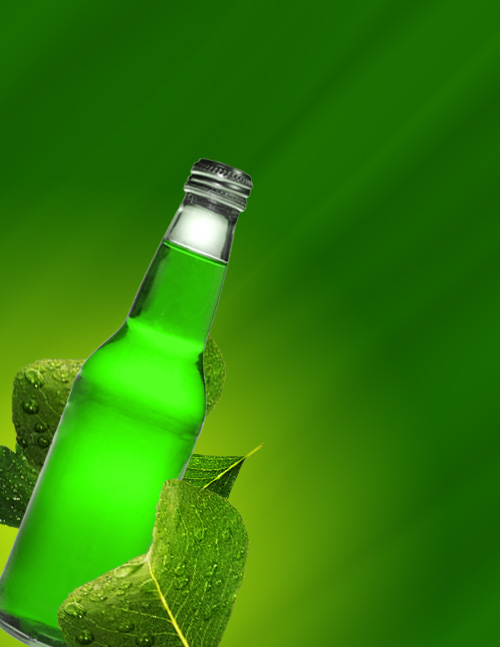
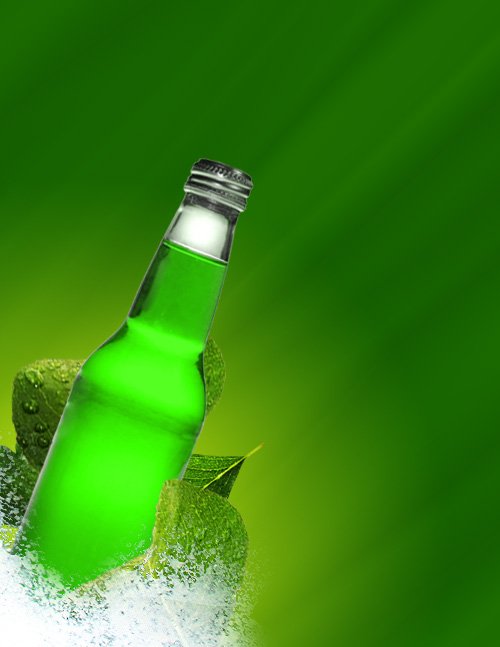
Step 3 – Adding Leaves and Splash
Bring the leaves into the ad the same way you brought the bottle in, and then place them in front of and behind the bottle. You can use them multiple times and rotate them to get better effects.Open the splash image. The only part of this image we want is the splash that is in the bottom right corner. To select this, we are going to select Color Ranges. Go to Select > Color Range. Use the Add to Sample Eyedropper and select different areas of the splash.
Click OK to select the areas that are in white. Remove the clouds from the selection by using a selection tool and holding alt.
Copy the splash and paste it onto a new layer in your ad. Re-size it and place it in the lower left corner on top of the bottle and the leaves. Then go to Filter > Sharpen > Sharpen to sharpen the splash. You may want to sharpen it a few times, but don’t overdue it. I also decided to grab a large soft eraser and partially erase the outer edge of the splash to soften it some.
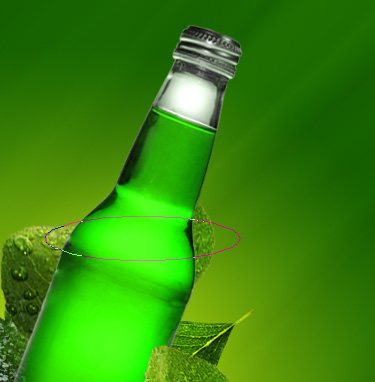
Step 4 – Adding the Rings and Strokes
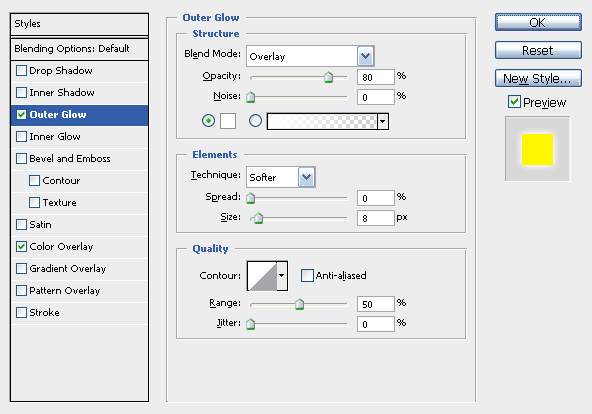
Adding the rings around the bottle is quite simple. Select a 3px brush. Then, grab the Ellipse Tool found under the Rectangle Tool. Using the Paths option, create a wide oval a little larger than the width of the bottle.Right click, and choose Stroke Path. Then select the Brush from the drop down menu and make sure Stimulate Pressure IS checked. Press Esc to delete the path. Then apply the following Layer Styles (Right Click Layer > Blending Options):
Outer Glow
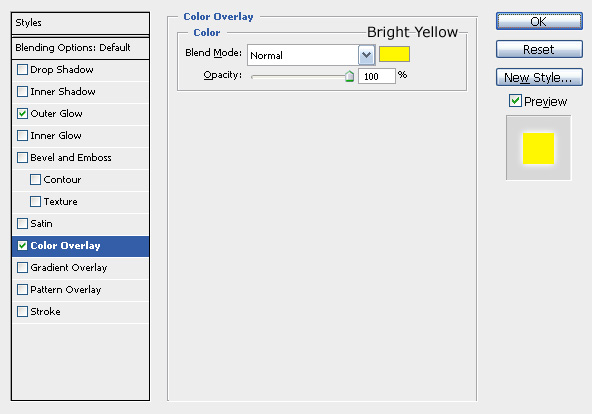
Color Overlay
All that’s left is to rotate the ring until its at a nice angle. To create more, simply duplicate the layer (Right Click > Duplicate Layer) and re-size them if needed.
To create the other strokes, use the Pen Tool, and apply the same layer styles shown above. Remember to place some layers behind the bottle and change opacity to create more effects.
Layer Styles
Right click a layer and copy its layer style to quickly paste the same layer styles onto a different layer.Step 5 – Adding Some Fun to the Ad
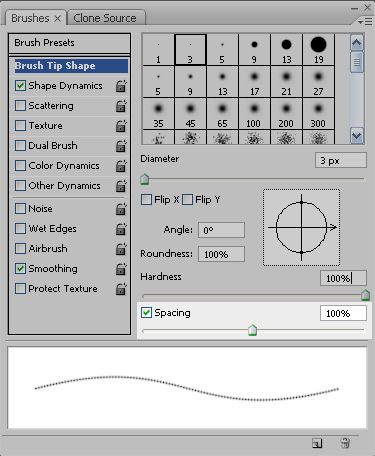
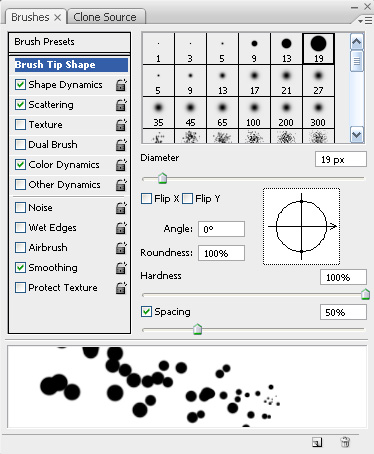
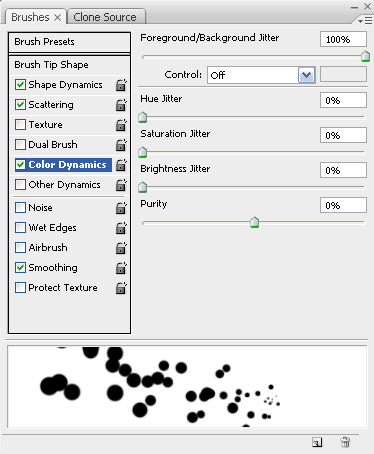
Create a new layer below your bottle. Then grab a 19px hard brush and change the settings to the following:Brush Tip Shape
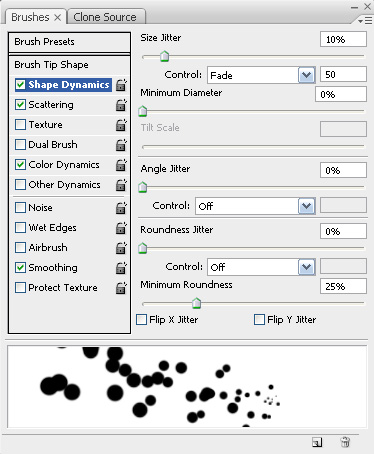
Shape Dynamics
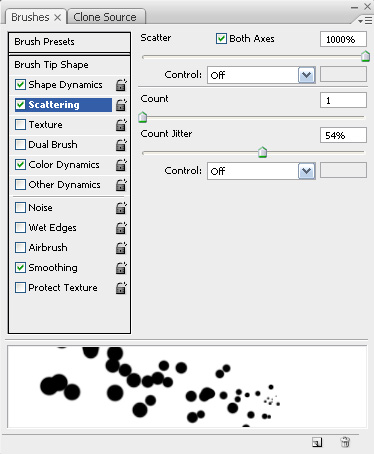
Scattering
Color Dynamics
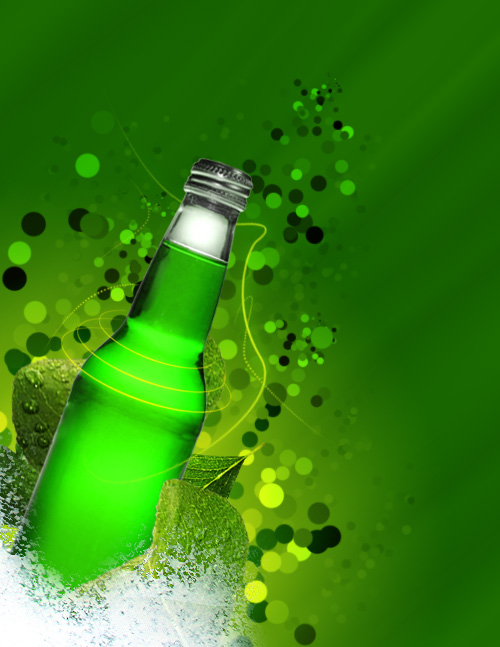
Then start brushing onto your new layer. Try to keep bigger circles next to the bottle and smaller ones as they move further away. Set the blending mode of the layer to Overlay when you are finished.
Do the same thing on a new layer with a smaller brush and lower the opacity of the layer.
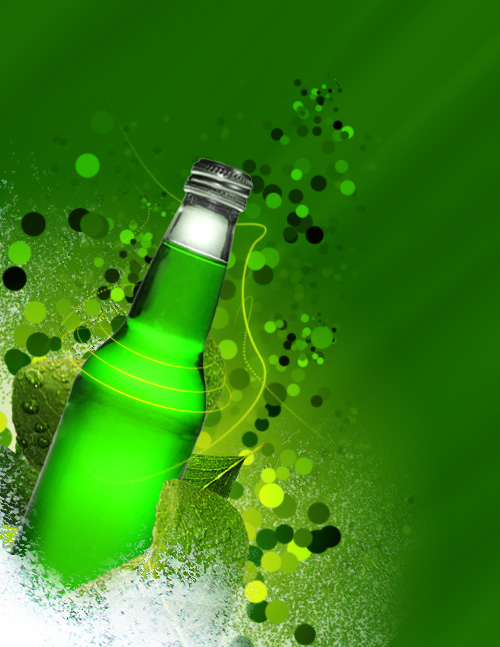
I’m also going to add another splash layer that will lie between the circle layers. After I have my splash in place, I’m going to Ctrl+Click on the large circle layer, and delete this selection from my new splash layer. This way, the splash won’t appear under the circles, since the circle layers are set to Overlay.
Step 6 – Finishing Up
Since my bottle doesn’t have any labels, I’m going to add my own. I’m also going to place the logo of my drink in the bottom right corner and add some small circles around it.And of course, here’s a PSD you can grab for free with the tutorial contents!
No comments:
Post a Comment