Last month I featured the incredible Photoshop and design work of Marco Peis here at Photoshop Roadmap. Let me say that I was literally flooded with emails and comments asking for more from Marco. Well, here’s an interview and a and incredible tutorial from him. Enjoy!
Hi Marco, thanks for taking the time for an interview! Let’s start with your background. Tell us a little bit about your job.
Well, I work for an international agency called EuroRSCG Vienna. We have international clients like Vichy, Peugeot, Citroen, and some else. But my first job was in a bank as a graphic freelancer.
It was a nice time, but veryyyyy boring. No conceptual, and only two colors. After that, i started tutoring in a graphic design school in Innsbruck. I made adobe training with the students – Primary photoshop ;DOne year later I wanted to learn more about 3D and gaming design, so I joined the Livingliquid team and later an animated 3D interactive adult games company. And after one year, I went to vienna, as a Junior Art Director because international clients, and big agencies are only there. (in Austria).
You have an amazing design website – http://www.gfx-lounge.com/ – how long has that been running and how has it affected your career?
Thank you very much! I think I’ve had that for less than a year. But there are only private works, and nothing from my daily work. And so it has only affected my career a little bit. And my site… omg^^…. It’s just a templates with my works :) I am not a webdesigner or something like that. Long time ago, I made some websites for my friends, but today I do not like it anymore. Just making 2D, and 3D photoshop manipulations.
We’re very interested in all things Photoshop. How important is this software for you?
Very important… it’s almost the entirety of what I do. In my daily work, I use Indesign and Illustrator, Cinema4D and zBrush too. But really Photoshop and zBrush are my mainstay tools for most of my creative work.
Did you teach yourself Photoshop?
I’ve been working with Photoshop since version 7, and I read really a lot of tutorials…. and during my graphic design school, I learned some more. I was always fascinated from photoshop pictures, which no one knew how they were made. And so I searched pictures… like some from Tony Ariwian or Behance. And after little time, I created my own style ;D
What is your favourite tool or filter in Photoshop and why?
Impossible question! No special tool or filter… but a menu command. Most of all I love the "Save as…", when the pictures is finished :)
Do you use any actions?
Nononono….. I do not like actions. I think that each picture should be done in calm and accurate.
What version of Photoshop do you use? If it’s not the latest version, do you think you will upgrade?
Now I use CS3… I always wait half a year to upgrade. So I can read the comments, if it’s good or not.
What other software do you use?
zBrush, Adobe Lightroom, Cinema4D, Illustrator and a few other.What are you favorite online sources of inspiration?
My Safari favorite folder is full with stuff from individual artists and blogs. But I 2 years ago I bought a hard disk to save all of these pictures. This is the best way to inspire.
Marco, thanks a million for taking the time to take the interview.
And here’s an exclusive Tutorial from Marco Peis. He shows us, how you can make an amazing water-person and tells us how you can give the clothes a metallic effect.
It’s an easy tutorial…. but it is difficult to put it into organized steps. Some techniques applied in this tutorial, need to be tweaked manually until you obtain the desired result. Remember that this is a work of art and not a "canned" Photoshop Effect.
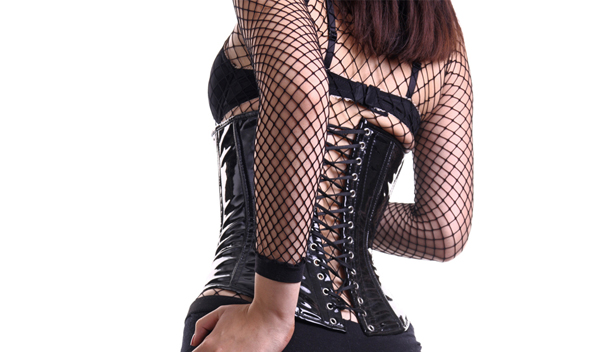
this is your picture from fotolia: http://www.fotolia.com/id/17079718. Although you can work with the preview image, this tutorial assumes you have a high resolution image and the results may not be exactly the same.

First of all you have to duplicate the image in a new layer and remove all the color information from that new layer using IMAGE > ADJUSTMENTS > DESAUTRATE.
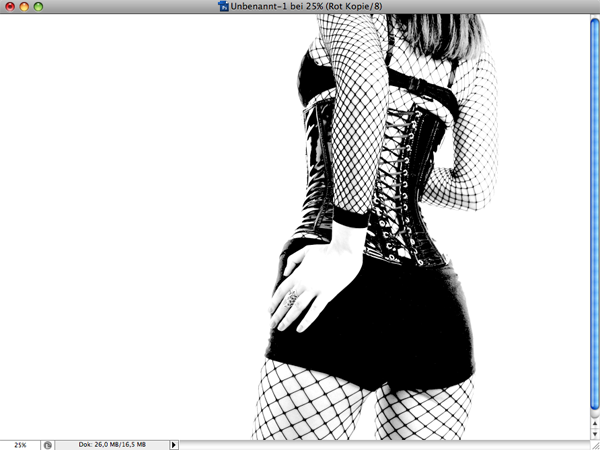
Now you must correct the image using IMAGE > ADJUSTMENTS > LEVELS. Play with the Levels command until you really overexpose the image leaving very little shades of gray and mostly black and white. Check the image above. Pay attention that the picture does not become pixelated. We will use this layer later.
Now select the first layer, the one with the color image. You are now it the color image layer. Go to the Channels palette an select the RED color channel. Duplicate this channel by clicking with the right button and selecting DUPLICATE CHANNEL. You will have to work this new channel the same way you did in the step before, using the Levels. But in this case, you will have to manually paint the clothes and hair to leave them black, because we will use this image as a mask to separate the clothes from the body.
Click on the RGB channel and then go to the LAYERS palette and select the layer with the color image.
Go to SELECT > LOAD SELECTION… and load the duplicate red channel you created in the last step. You will now see a selection.
Go to SELECT > INVERSE. And then go to LAYER > NEW… > LAYER VIA COPY… A new layer with the clothes only will be created above the color image layer.
So now we have A background layer with the color photo, a second layer with the clothes and hair, a third layer with a overexposed grayscale image.
Go to the third layer, the one with the overexposed grayscale image. Select COLOR from the Blending mode palette menu, and set the OPACITY to 63% or similar. This will reduce the color saturation and give the whole image a dark look.

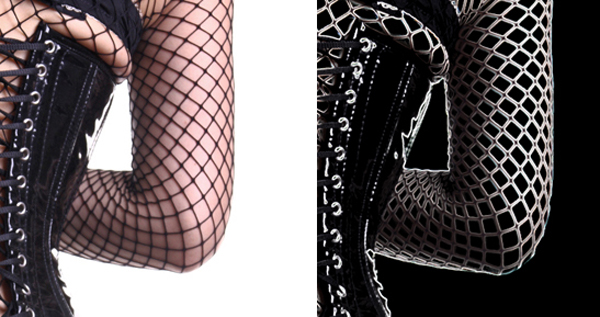
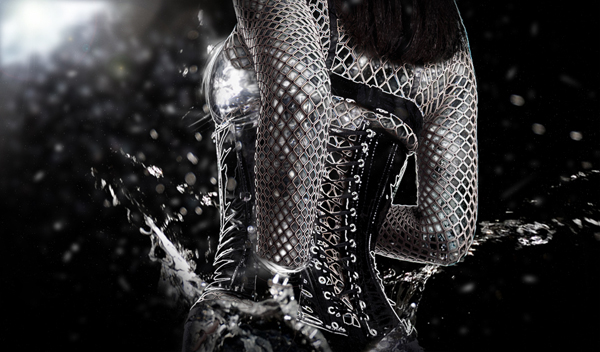
Now select the background layer, the one with the color image and go to FILTER > STYLIZE > GLOWING EDGES… use 3,4,1 as the filter’s settings. Now you will see that the clothes looks like metal.
Your picture should look like this. Now, create a new layer between the BACKGROUND LAYER (the color image) and the clothes layer.

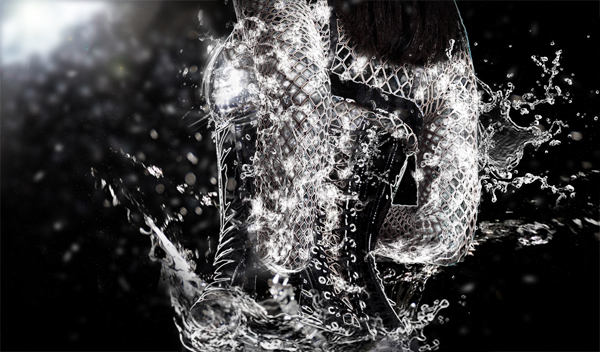
Try to find some water splashes brushes and paint with them in the newly created layer, between the color image and the clothes layer. A quick search in Google will bring you plenty of them.
Using a big water splash brush, create a sun or something similar and blur it. This will give a subtle perspective effect bringing the subject closer to you.
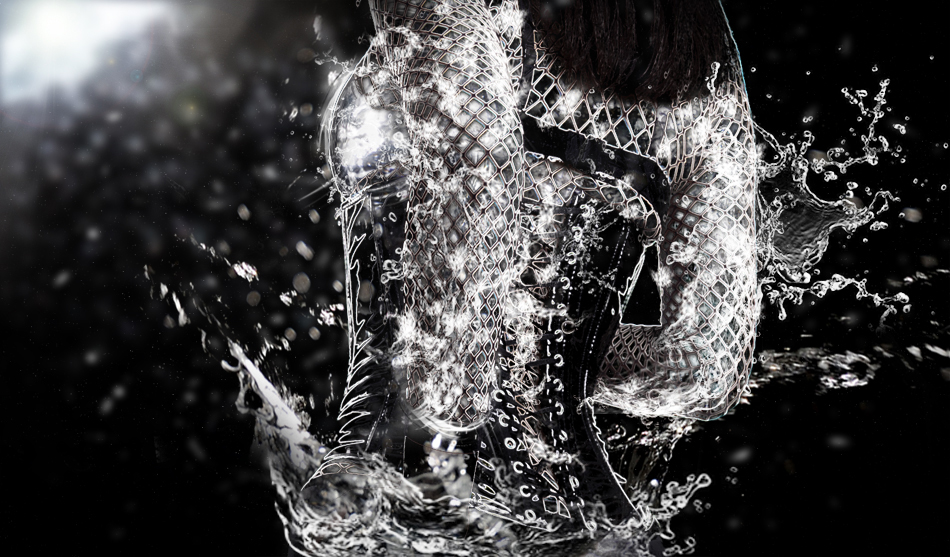
Create a new layer in front of all the layers and paint some more water splashes. Click here for the final, full resolution, image. THANKS MARCO FOR THIS AMAZING TUTORIAL!!
No comments:
Post a Comment